How to Wrap Your Horse’s Legs
Standing Bandages for Swelling & Support
Updated November 2, 2023

Wrapping a horse’s legs is a skill every rider and owner should master. Whether you’re putting on polo wraps for a lesson, shipping bandages for trailering, or standing wraps overnight in the stall, there are many reasons why the equine limb might need additional support.
The most important things to remember about bandaging a horse’s legs are:
- Do not apply the wrap too loosely, because it could slip down the leg and cause the horse to trip or spook.
- Do not apply wraps too tightly or unevenly, because they could reduce or cut off blood circulation or cause what is known as “cording” or a “bandage bow.” This is damage to the tendons on the back of the leg (bowed tendon) from an improperly applied bandage.
Types of Leg Wraps for Horses
First, it’s important to understand the types of wraps available in order to select the appropriate one for your horse’s needs.
- Polo Wraps: Also called training bandages, polos are used to support and protect the legs during exercise. They’re typically made of a soft, stretchy material like fleece and have a Velcro fasten at one end. Polos are about 5 inches wide and 9 feet in length. Training wraps are designed to be breathable and lightweight, and some are made with silicone to prevent slippage.
- Read this step-by-step guide on how to polo wrap your horse.
- Standing Wraps: This type of wrap is also known as stable bandages or shipping wraps. As these names suggest, these bandages are typically used when a horse’s movement is restricted, such as when he’s stalled, on cross ties, or during transport. Standing wraps are taller and longer than polos – about 6 inches wide and up to 12 feet long. They’re also less stretchy than polos and made of a thinner knit or polyester material.
- Quilts: Standing wraps are often used over quilt wraps (also called a stable cotton). A quilt provides an additional layer of padding to protect a horse’s legs. They’re made of cotton and are available in several heights (12, 14, or 16 inches) to best match different sized horse’s front or hind legs. As a general rule of thumb, a quilt’s measurement is taken just below your horse’s knee or hock to the fetlock.
Basics of Wrapping Horse’s Legs

Preparing Your Horse and the Wraps
There’s nothing more frustrating than trying to finish wrapping a wiggly horse’s legs only to find the Velcro is on the wrong side. To ensure the application process is as easy as possible, first make sure your wraps are rolled correctly.
To correctly roll a wrap (especially brand-new bandages), start by taking the Velcro end and place the closure on the inside (so it’s inside out). Roll the wraps snugly and evenly to make unrolling them against the legs easier and more uniform.
Before applying the wraps, your horse’s legs should be clean and dry, he should be standing on level ground, and either tied safely or with someone holding him.
Wrapping Two to Four Legs
A rule of thumb is that if you’re going to wrap one front or hind leg (for example, to cover a wound), you should wrap the adjacent leg, too. Wrapping both front or back legs will provide equal support. This is especially important in the case of an injury where circulation might be compromised. Horses are also less likely to try to chew or kick a bandage off their legs if they all feel the same.
How to Correctly Apply a Standing Wrap
All wraps are put on the legs with the material wrapping in the direction toward the back or tail of the horse. On the left legs, you’ll wrap in a counterclockwise direction, but for the right legs you’ll wrap clockwise.
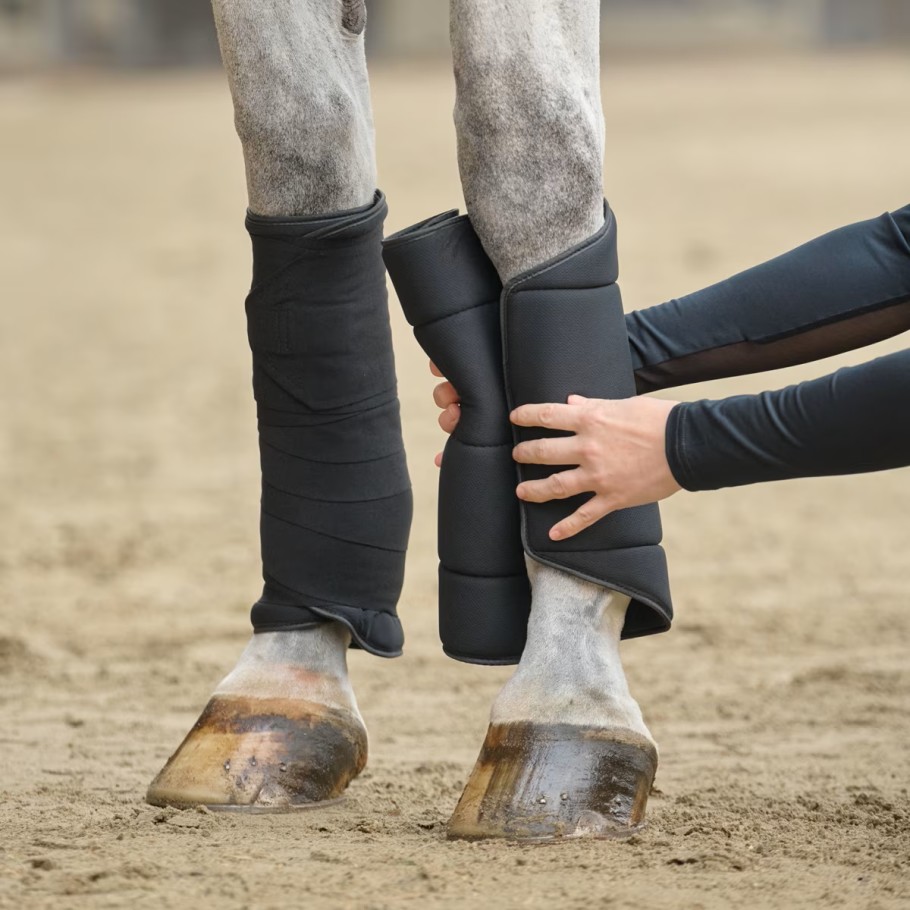
- First, you must put on the quilt. Although there’s no Velcro on this padded layer, try to roll it inside-out before beginning.
- Keep the rolled-up portion of the quilt toward the back of your horse’s leg and make sure the inside of the roll is facing you.
- You should have just enough bandage out in front of the leg so that when you wrap it around to the inside, it ends in the little groove behind the cannon bone and in front of the tendons. You can adjust the length if necessary.
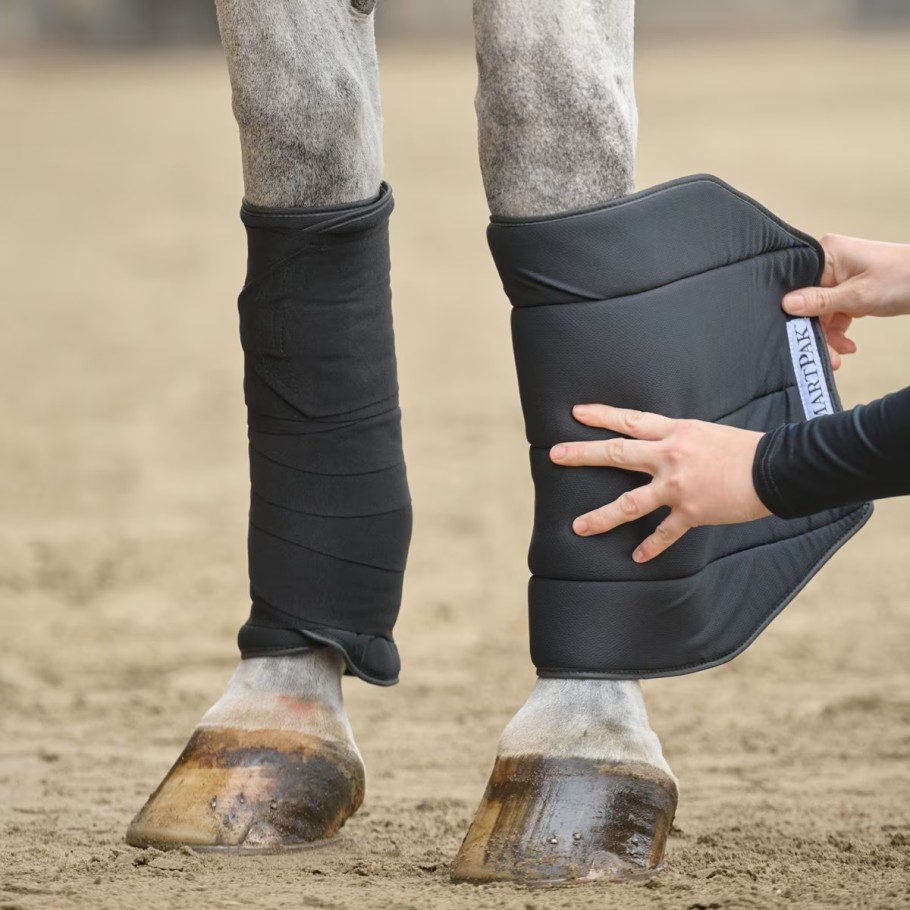
- Smoothly unroll the cotton around the leg so that the first wrap covers the end.
- Once the end of the quilt is secured, you can let go of it and begin wrapping in even, level layers until the quilt is completely unrolled.
- Take the end of your standing bandage and place it about midway down the cannon bone. (Your starting point may change depending on the length of your wraps and height of your horse’s cannon bones.) Tuck the end 1 or 2 inches inside the end of the quilt.
- Again, keep the rolled-up portion of the standing wrap toward the back of your horse’s leg and check that the inside of the roll is facing you.
- Try to maintain even tension on the bandage as you smoothly unroll it around the leg and cover its end. Don’t tug or let it go loose.
- When you’ve secured the end of the standing wrap, let go of it and begin wrapping down the leg.
- Never pull the wrap tight when on the inside of the leg as this could damage the tendons by pulling them forward. Only tighten when the wrap is positioned on the front of the leg, so it’s pulling over the cannon bone toward the back.
- Each turn should cover about 50% of the material from the last turn.
- As you reach the fetlock area, leave about a half to 1 inch of cotton sticking out at the bottom and then continue spiraling back up the leg.
- When you’ve reached the top of the leg, do the same by leaving a bit of quilt visible right below the knee or hock.
- End by attaching the Velcro at the top or toward the middle of the cannon bone.


Keep in mind, there are lots of variations to wrapping, such as applying a shipping bandage over a bell boot, sweating a leg, or wet poulticing. A standing wrap can also be used to protect a wound that may have been treated with topical medication, a non-stick pad, and vet wrap or brown gauze as the first layer. Just remember to put a standing wrap on the other (non-injured leg), too.
More Tips on Wrapping
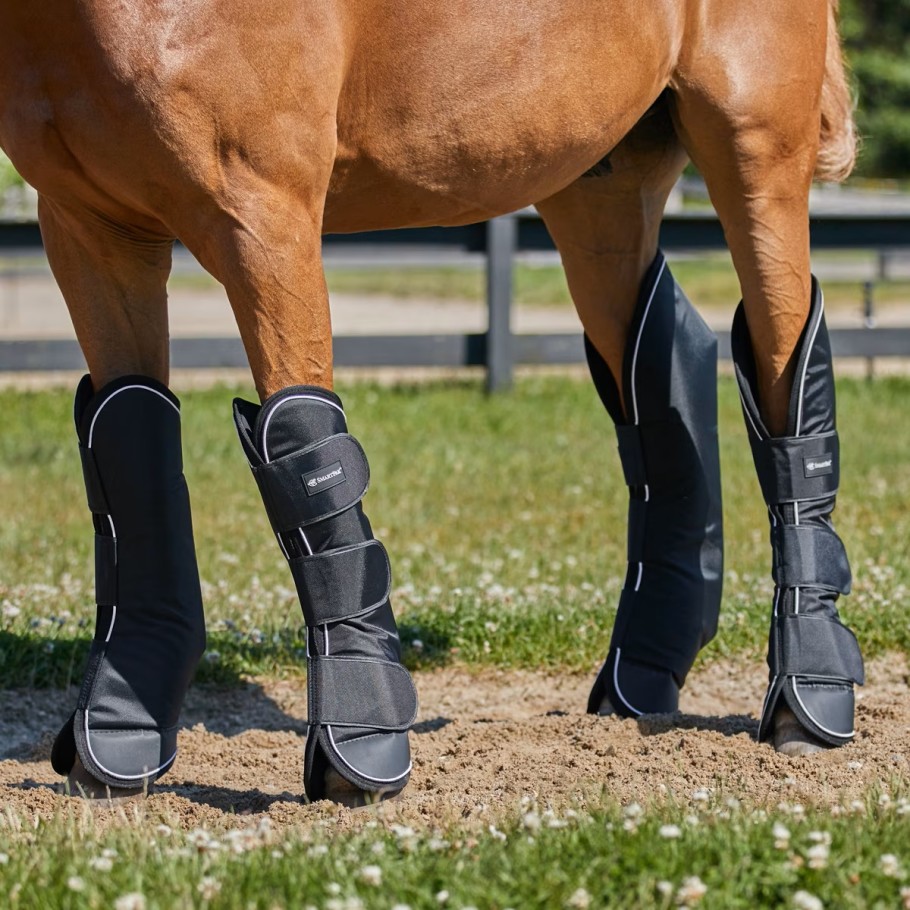
- When applying shipping wraps, the bandages should be taller than your normal standing wraps. Shipping wraps should run from the normal height of right below the knee or hock and extend to just below the coronet band of the hoof. This is to protect that sensitive area and the heel bulbs during transport. Another option for transport is to use shipping boots which typically cover the knees, hocks, fetlocks, and coronary bands.
- Your wraps should lay flat without any lumps or folds of fabric. To prevent this and achieve a stovepipe finished look, use consistent pressure around the leg.
- Take the wraps off your horse every day to clean his legs, prevent skin irritation, check for signs of heat or swelling, and relieve any pressure points that may have formed.
- If wrapping over a wound, make sure you’re first cleaning and protecting the area as your veterinarian has recommended before applying the quilt.
- Its best practice to have the same person wrap both legs so the amount of tension matches as closely as possible.
- For young horses or those unfamiliar with wearing wraps, try not to leave them unattended. Make sure your horse is comfortable wearing wraps before leaving him alone or loading him on the trailer.
- Wash your wraps and quilts after use to make sure they’re sanitized and ready for the next time they’re needed.

Practice Makes Perfect
These are the basic instructions for applying standing wraps. Ask your veterinarian or trainer to teach you how to safely put on a variety of wraps. With practice you’ll soon learn just where to start, the correct tension, and how much to overlap so that you end at the right spot every time.