Button Braids: How To’s and Top Tips
Updated June 8, 2022

There are many types of braids for different disciplines of riding and breeds of horses. Button braids are typically seen in dressage competitions (hence them also being called “dressage braids”) or in eventing and show jumping. Great braids can add a level of polish to a winning ride, while messy, loose braids can be a distraction. But braiding is hard, especially for beginners!
For those starting out, one of our best tips is that practice makes perfect! It may take a while before you master button braids with rubber bands, thread, or yarn. Follow our step-by-step instructions on how to button braid and your horse will be show ring-ready in no time!
Button Braiding Kit Essentials
Before starting, make sure you have all the braiding tools you will need and a clean mane.
- Step stool or mounting block to stand on
- Mane brush and pulling comb
- Yarn, thread, or rubber bands (have scissors if using yarn/thread)
- Braiding spray or a water spray bottle
- Braiding needle, hook, or pull-through tool
- Seam ripper for removing braids
General Button Braiding Tips

- Wet the mane first – it makes hair easier to manage.
- Divide the mane into sections. This can be done with bands or by using a hair clip to section off each braid. When sectioning off hair, ensure the hair parting is straight from top to bottom (not crooked or angled).
- The braid itself should be tight and start as close as possible to the crest of the neck.
- For those horses with a thick mane or one that has been pulled too short, you can use a three-pronged braiding comb to section off each braid. This comb is a good guideline for the width of the braid. Numerous braids normally must be put in thicker or shorter manes.
- For horses that have thin manes, you may want to keep the mane a little longer and then put fewer braids in the mane itself. Providing it is at a suitable length, you can use the width of a regular mane comb to section off each braid.
- When learning to braid, don’t feel you must use thread or yarn. For some people, using rubber bands is much quicker and you still have show-ready results. Whatever way you feel produces the most even, tidy look is the best way for you to go.
- Ideally, you should start braiding from the bridle path and work your way down. Sometimes it may be a better plan to start from the withers if the horse is head shy by his ears. For some horses, this approach can help them relax so by the time you get to their head they realize you aren’t going to pull their mane or attack them with clippers!
- If sewing in braids, cut the thread to a suitable length (approximately 10 – 12″ for each braid). Although it takes longer, it is less likely to cause tangling of the thread than trying to use a long piece of thread to do several braids at one time.
- When using rubber bands, you can place several bands on each of your fingers and then pull one off as needed.
Step-by-Step Button Braiding Instructions
The following is a horse braiding technique that is easy to learn and useful for manes that may not be pulled to your liking – for example, the mane pictured is a little bit on the long side.
- Using the width of a pulling comb to section off the braid.
- Take the first section and braid tightly down, using a rubber band at the bottom to end the braid.
- Fold up the bottom of the braid and twist the rubber band around the bottom to produce a tidy end with no hairs poking out.
- Take your needle and thread and sew it into the bottom of the braid. You can do three loops through the braid and tug at the end to make sure the thread is in securely.
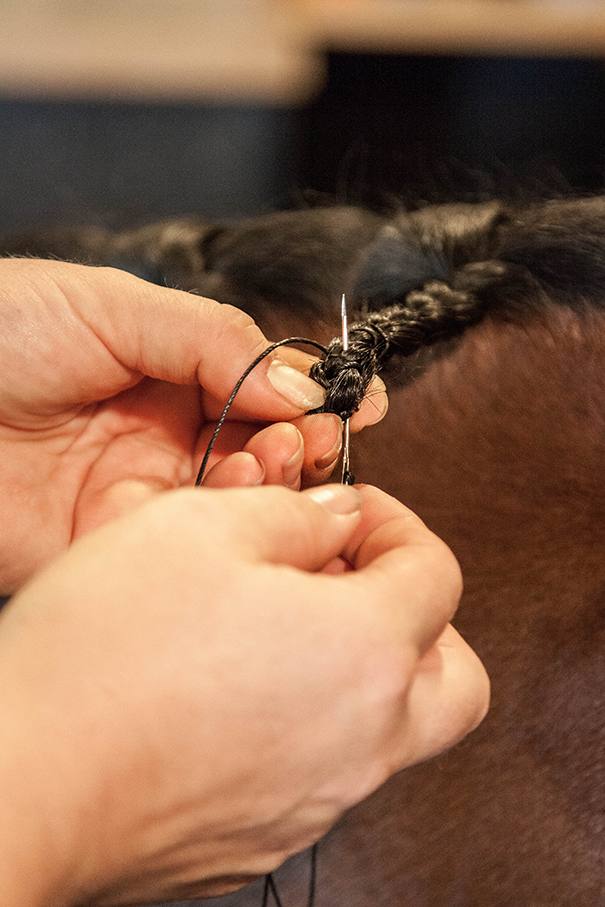
- Take the bottom of the braid and fold it on the underside to the base of the neck (you could sew the thread through the base once to help secure the braid). Fold the braid in half once more to make a neat button braid.
- Sew the braid from the bottom ensuring you are going through all the folds and coming out the top center of the braid. Always be careful with the needle, but the closest you can sew to the crest of the neck, the tighter the finished look.

- Repeat sewing through the braid until you feel it is secure. This could take three or more passes through the button braid.
- Cut the thread as close to the braid as possible.


We hope this helps some of you on your quest for the perfect braid. Remember, practice makes perfect!
Originally published August 27, 2013