Pro Groom’s Secret Weapon: The Horse Vacuum
Updated July 7, 2023

A vacuum can be a very useful piece of equipment in the barn. It can help speed up the grooming process by sucking up dirt, dander, and bugs that may irritate your horse’s skin.
For those living in sandy areas, vacuums are great for removing those tiny particles from the coat, which can sometimes play a big role in reducing skin conditions. In the colder months when it’s not as convenient to bathe your horse, a vacuum session can be effective in removing dirt and dead hair from a thick winter coat. Once your horse is trained and accustomed to being vacuumed, this option can reduce time and effort on your part while still resulting in a show-ready, healthy coat.
Different Vacuums for Horses

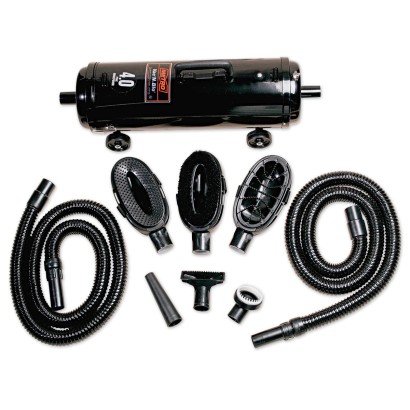
There are several different vacuums on the market such as the Vac N’ Blo Pro and others designed specifically for use on equines. Each brand of vacuum will have its own attachments, directions, and containers for holding the dirt. You can also use a shop vac available from a hardware store with the right attachments for horses.
Whichever you decide to use, be careful when first introducing this equipment to your horse. Some horses will not be bothered by the look of the equipment or the sound. However, for others, their fear instinct will automatically be switched on!
Tips for Safely Introducing Your Horse to the Vacuum
- Ensure you have the time to work with your horse daily. The whole process could take 10 minutes to one month, depending on your horse’s temperament.
- If you have a nervous horse, keep the sessions 10 to 15 minutes long so your horse does not become agitated.
- Remember that you are aiming for no reaction from your horse. Work, move, and talk calmly.
- Reward your horse when he shows no signs of fear.
- Keep the work area clutter-free.
- Keep and store the vacuum in a safe, dry area away from water.
- Once the process is second nature, try to maintain it by vacuuming at least once a week or bi-weekly so your horse stays relaxed around the vacuum.
The main safety precaution concerns the cord and electrical elements in the vacuum. You don't want the vacuum to hit anything, be knocked over, and spook your horse. You don’t want your horse to have the cord around their hooves and get tripped up either. The best scenario is to have power outlets available on both sides of your grooming area or a long enough extension cord so that you can safely plug in and use the vacuum.
How to Get Your Horse Used to a Vacuum
First Timers
First, let your horse get used to the sight of the equipment prior to using it. If you have a grooming stall, place the equipment close to the area for a few days or across the aisle. Carry on with your normal grooming routine and note your horse’s reactions.
If he appears unreactive, then place equipment in the location where you will eventually be using it. Do this for a few days so he becomes accustomed to it. If he becomes nervous, place the vacuum further away until he shows no reaction.
For extremely nervous horses, try just holding the horse in the grooming stall and do not put him on cross ties. When he appears to relax, reward him with a treat or pat on the neck. You will want to repeat this step every day until the equipment does not produce a reaction.
Noise Introduction
The next step is introducing the vacuum’s noise. You should place the vacuum away from the grooming area. Just hold your horse in the grooming stall (not on cross ties) and have someone turn on the vacuum.
To start, just run it for 5 seconds so your horse gets used to the sound of it turning on and off. Reward him for no reaction. When relaxed, let the vacuum run for longer. Again, reward him for good behavior. Now you can move the equipment to the grooming stall and repeat the process. Should he show fear, return to where it was originally placed and repeat the on/off process.
Touch Introduction
Once your horse is comfortable and relaxed with the sound of the vacuum, have a handler hold him for this next step. Taking the hose in your hand DO NOT turn on the vacuum. Talk calmly and move slowly towards your horse. Let them sniff the hose and relax before touching his body. Again, a reward will go a long way.
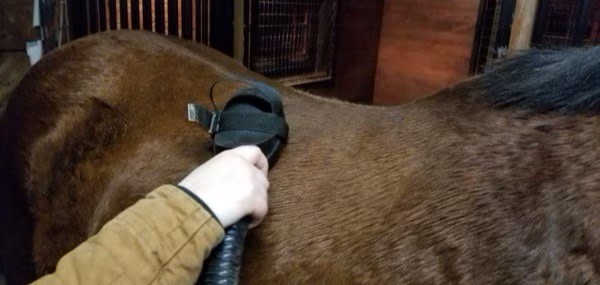
Starting at the shoulder, slowly move the nozzle over your horse’s body, working towards the tail (again, leaving the vacuum off). First, try to avoid sensitive areas such as the flank and lower legs. Contact should always be kept between your horse’s coat and the nozzle. Continue to do this until your horse is relaxed. When he relaxes, he might take a deep breath or chew, remove the nozzle pressure, and reward him. Repeat this process every day until it causes no negative reaction from your horse.
The Grand Finale
Remember to reinforce the noise aspect by running the equipment first and then turning it off when introducing the pressure of the nozzle. Once all this causes no reaction, you can move on to actually vacuuming your horse.
Start at the lowest speed and ensure the suction is not so strong that it frightens your horse. Cover the large muscle groups first, adding pressure where he allows.
In future grooming sessions, curry your horse to loosen up and remove hardened dirt before turning on the vacuum. Eventually, you should be able to “massage” the hindquarters to get the best cleaning effect. Along the flanks and upper legs, go with the direction of the hair.