Horse Tack and Leather Care Guide
Updated December 9, 2022

Your horse’s tack is an investment and taking great care of it is essential to ensuring that it will last for years to come. The secret to keeping your tack beautiful is cleaning it after each use and periodically conditioning it.
Regular care and cleaning don’t just keep it beautiful, but it also helps ensure that you’re staying safe. That’s because cleaning your tack allows you to inspect your equipment, prevent sweat and dirt from building up and causing cracks in the leather, and catch any signs of wear and tear before they become a problem when you’re in the saddle.
Here, you’ll find a list of the supplies you need to keep your tack clean, soft, and supple, and step-by-step instructions for how to clean, condition, and oil it.
Leather Tack Cleaning Supplies Checklist

- Tack cleaning sponge - an essential in your tack cleaning kit! These sponges, which are typically small and round, are used to apply whichever product you use to clean and condition your tack.
- Terry cloth towel - a great tool for wiping away everyday dust, dirt, and sweat and for tackling built-up grime and mold on old, dirty tack.
- Leather cleaner - can remove dirt and sweat from your tack. In addition, leather cleaner is perfect for tackling mildew and grime from any leather tack that’s been improperly stored. To keep your tack looking good as new, you’ll want to use leather cleaner on it after every ride.
- Leather conditioner - applied to help your tack stay soft and supple after you’ve cleaned it with a standard leather cleaner. Leather conditioner is especially helpful for breaking in new tack and breathing new life into older tack. A good conditioning is beneficial no matter how old (or new) your tack is.
- Glycerin soap - a specific type of saddle soap that’s been a staple in tack rooms for years. It works to seal the pores of the leather, giving it a like-new glossy finish and protecting it from dirt.
- Oil - oiling your tack will help soften and protect it. The most common time to oil your tack is when it’s brand new because it will help break in the leather faster. Oil is also helpful for reviving dry, dirty tack. Certain types of oils can be used to darken light-colored leather for those riders who prefer darker tack or who are looking to match the color of a new piece of tack to the color of an older piece of tack.
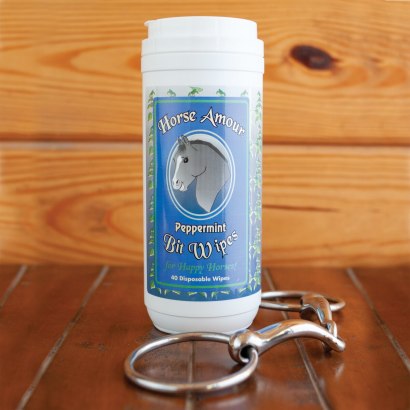
- Bit wipes - when you’re giving your horse’s tack its daily cleaning, you don’t want to forget about your horse’s bit! Bit wipes make it easy to get your horse’s bit sparkling clean.
- Metal polish – used to clean and shine all the metal pieces of your tack, including your bridle and saddle hardware, nameplates, and any silver on Western saddles.
- Toothbrush - makes it easy for you to clean all the nooks and crannies in your tack without damaging your leather. It’s also perfect for scrubbing bits.
- Gentle bristle brush - may be used on a suede seat, knee pads, or to rough-out areas.

How to Clean Leather Tack
Step 1: Clean
Follow these steps and tips for cleaning your horse’s tack. Keep in mind that many tack manufacturers have specific cleaning instructions for their tack and recommend certain cleaning and conditioning products, so be sure to check in with the manufacturer before you get started.
- For a full, deep cleaning, first unfasten any buckles, pull the leather out of its keepers, and remove any fittings from your tack. For everyday wipe downs, you can leave most pieces intact without removing the leather from the keepers, etc.
- Use a towel or a sponge moistened with water to wipe any dust, dirt, mud, hair, or other debris from the leather.
- Take a damp sponge and add a small amount of leather cleaner to it. Apply it to your leather tack in small circular motions, covering the entire area while avoiding any suede or rough-out areas. In this step, the leather cleaner will remove any dirt and grime that the towel didn’t wipe off. Rub the cleaner into the leather until there’s no residue left over from it.
- Clean the parts of your tack that are under pressure during use or where sweat and saliva may collect, including around the buckles, where the cheekpieces attach to the bit, billet straps, and your stirrup leathers.
- When cleaning the tooling of your saddle, use a gentle tool such as a soft toothbrush. Apply a small amount of leather cleaner to the bristles and work the cleaner into each and every crevice with the toothbrush. Western saddles with tooling will take some extra care because the nooks and crannies of the tooling tend to capture all kinds of dust and dirt. Adding a touch of water at the beginning of the process will help to loosen up the dirt. It’s also helpful to wipe often with a soft rag to remove the dirt you’ve loosened.
- If you have a suede seat, knee pads, or rough-out areas, you can use a soft bristle brush to brush up the nap. Keep in mind that you’ll want to do this sparingly because it can cause bare spots or holes if done too frequently.
While you’re cleaning, be sure to perform a safety check of your tack at the same time. It’s important to check that all stitching is tight, intact, and that the leather isn’t cracked, ripping, or showing excess wear.
Step 2: Condition
Once your tack has been cleaned, a conditioner can be used to restore the moisture removed by the cleaning process and help ensure the leather stays soft and supple. How frequently you condition your tack will depend on how often you ride, the conditions in which you ride, and the climate and weather in your particular area. Some tack manufacturers may have specific guidelines for how frequently their tack should be conditioned, so be sure to check in with them if you’re unsure of how often you should condition your tack. Here are the steps to condition your tack:
- Take one of your tack sponges and apply a small amount of leather conditioner to it.
- Using that sponge, apply a thin coat of conditioner to all the leather parts of your tack.
- Rub the conditioner into the leather and into all of the nooks and crannies in your tack.
If the conditioner disappears immediately, add another thin coat and work it into the leather. If the conditioner hasn’t been absorbed within a couple of minutes, wipe off the excess conditioner with a towel and don’t apply any more. Applying too much leather conditioner can lead to the conditioner penetrating through to your saddle’s padding or tree, which could cause damage over time.
If you’re planning on both cleaning and conditioning your saddle but are short on time, consider using a combo product that includes both a cleaner and a conditioner. You can tell if a product is a combo by reading the product description and seeing if it’s described as serving as both a cleaner and a conditioner.
Step 3: Oil (if needed)
Your final step should be oiling, which should be done sparingly and if needed. Just like with cleaning and conditioning, some tack manufacturers have their own recommendations for how often to oil your tack. Other times that you may oil your tack are when it’s brand new or if it’s older and the leather has dried out.
- Like with leather cleaner and conditioner, it’s a good idea to apply the oil first to a sponge to help prevent over-oiling.
- Use the sponge to apply the oil to your tack and rub it in evenly.
- Use a towel or clean, damp sponge to wipe off any excess oil because excess oil may attract dust and dirt.
How to Care for Moldy Leather Tack
Reviving moldy leather tack requires patience, time, and a lot of elbow grease! If you’re tackling moldy leather, it’s a good idea to clean it outside or in a well-ventilated area so that you can avoid inhaling mold spores.
- Use a damp rag to start wiping away any surface mold. We recommend having a supply of old rags on hand, because you’ll likely want to toss them once you’ve used them!
- Wipe away and capture as much of the mold as you can. Use a toothbrush to get into any nooks or crannies.
- Once you’ve wiped the mold off your tack, it’s time to clean it. Add your favorite leather cleaner to a tack sponge, and use that to thoroughly clean the leather.
- Once you’ve removed all traces of mold, cleaned the leather, and allowed it to dry, condition the leather using the process outlined above.
- Make sure your tack is completely dry before you put it away, and consider using the storage methods outlined below to help keep your tack clean and protected in the future.
How to Store Your Leather Tack

All leather tack should be stored clean, dry, and under cover, away from the weather and dust. In a perfect world, tack should be stored in an area that’s kept at a slightly cool but consistent temperature. Leather tack should also be stored away from direct heat sources, such as a furnace duct or heater, as excess heat will dry out the leather. For extra protection, consider storing your saddle with a saddle cover or in a saddle tote.
While cleaning and conditioning your tack may seem like a chore, think of it as an investment in your tack’s future. By properly caring for your saddle, bridle, and any other leather goods, you’re helping ensure that you can use them safely for years to come!
If you need any help picking out the perfect leather cleaner, conditioner, or oil for your equipment, don’t hesitate to contact our Customer Care Team. They’re riders like you who have been cleaning tack for years, and they’re happy to help you tackle all your tack cleaning problems!
Originally published March 30, 2018