Fun Trend Alert: Tie-Dye Saddle Pads
We’re back with another quarantine trend and this time it’s tie-dye! Tie-dyed loungewear seems to be the style of the moment and I couldn’t resist putting an equestrian twist on it. This was such a fun project and pushed me out of my white, navy, hunter green comfort zone, bringing some color and excitement into the barn.
What you’ll need:
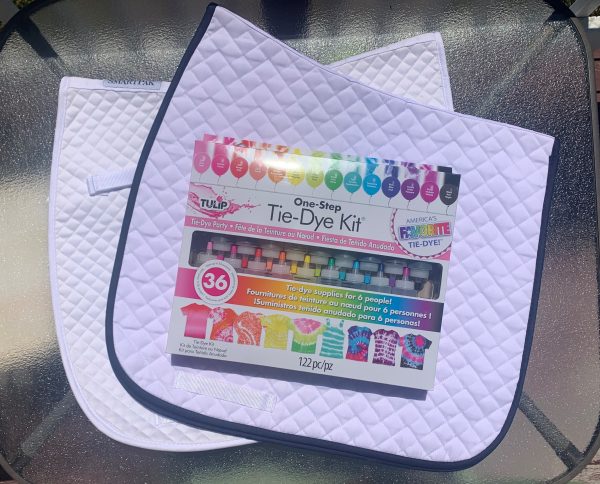
- Saddle Pad (white or light color)
- Tie-dye Kit
- I ordered a Tulip One-Step Tie-Dye Kit from Amazon
The kit I ordered came with 18 bottles of color and I ended up using 3 bottles per pad so make sure you have at minimum 3 bottles of color for each pad you dye
- I ordered a Tulip One-Step Tie-Dye Kit from Amazon
- Other (if not included in your kit)
- Gloves
- Rubber bands
I used the rubber bands included in the kit, but because the saddle pads are so thick it was hard to get them on and some of them broke. Would suggest ordering some large rubber bands to make it easier - Plastic table cover
- Plastic wrap
Steps:
- Pre-wash fabric with no detergent or softeners. After washing I tumbled the saddle pads for about ten minutes but took them out still damp as it makes it easier to fold the material.
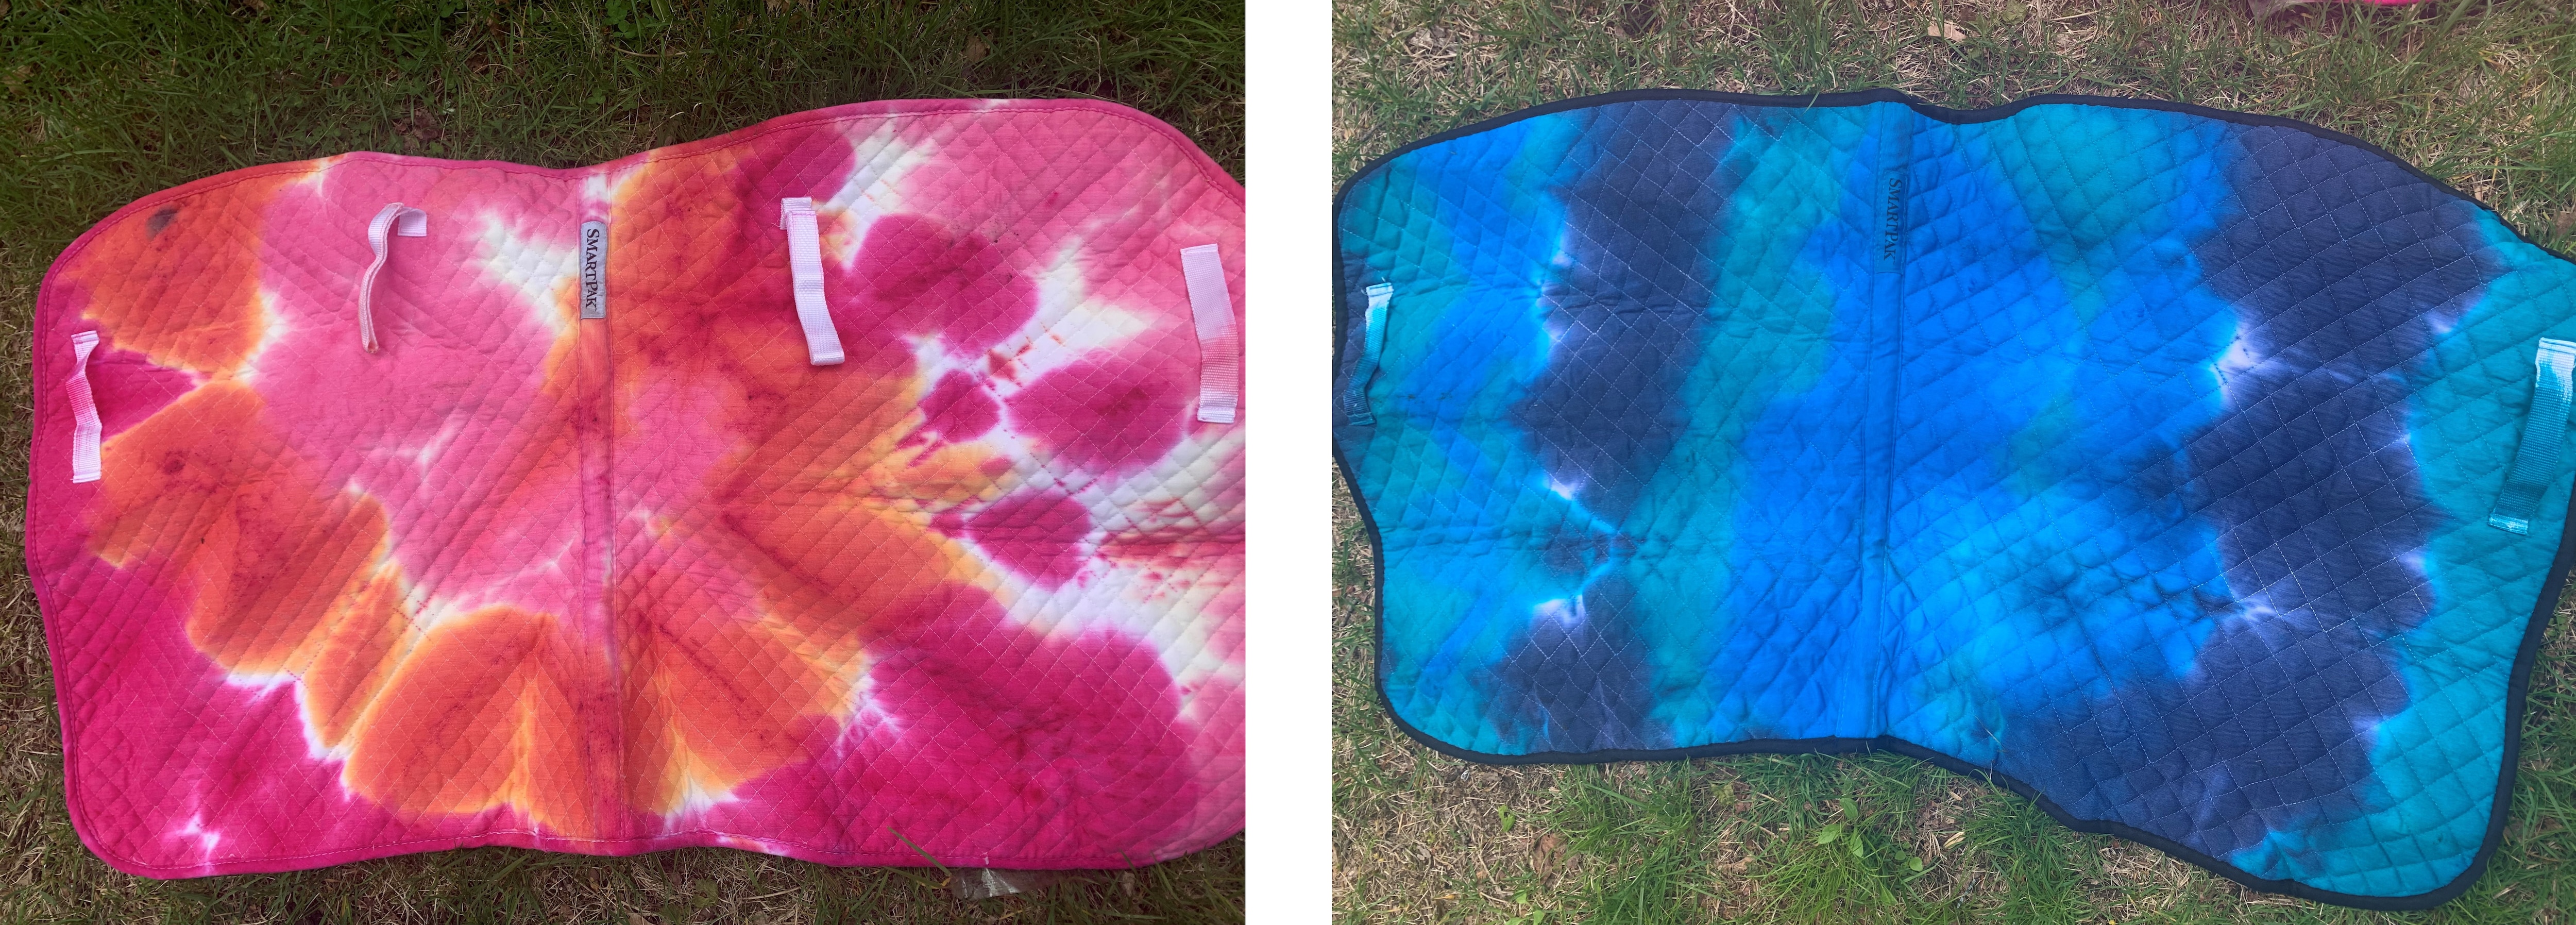
- Fold and secure your fabric with rubber lots of rubber bandsFor the SmartPak Lite White Saddle Pad I used an accordion fold, secured this with rubber bands at each end of the pad and then rolled the folded padded into a spiral.
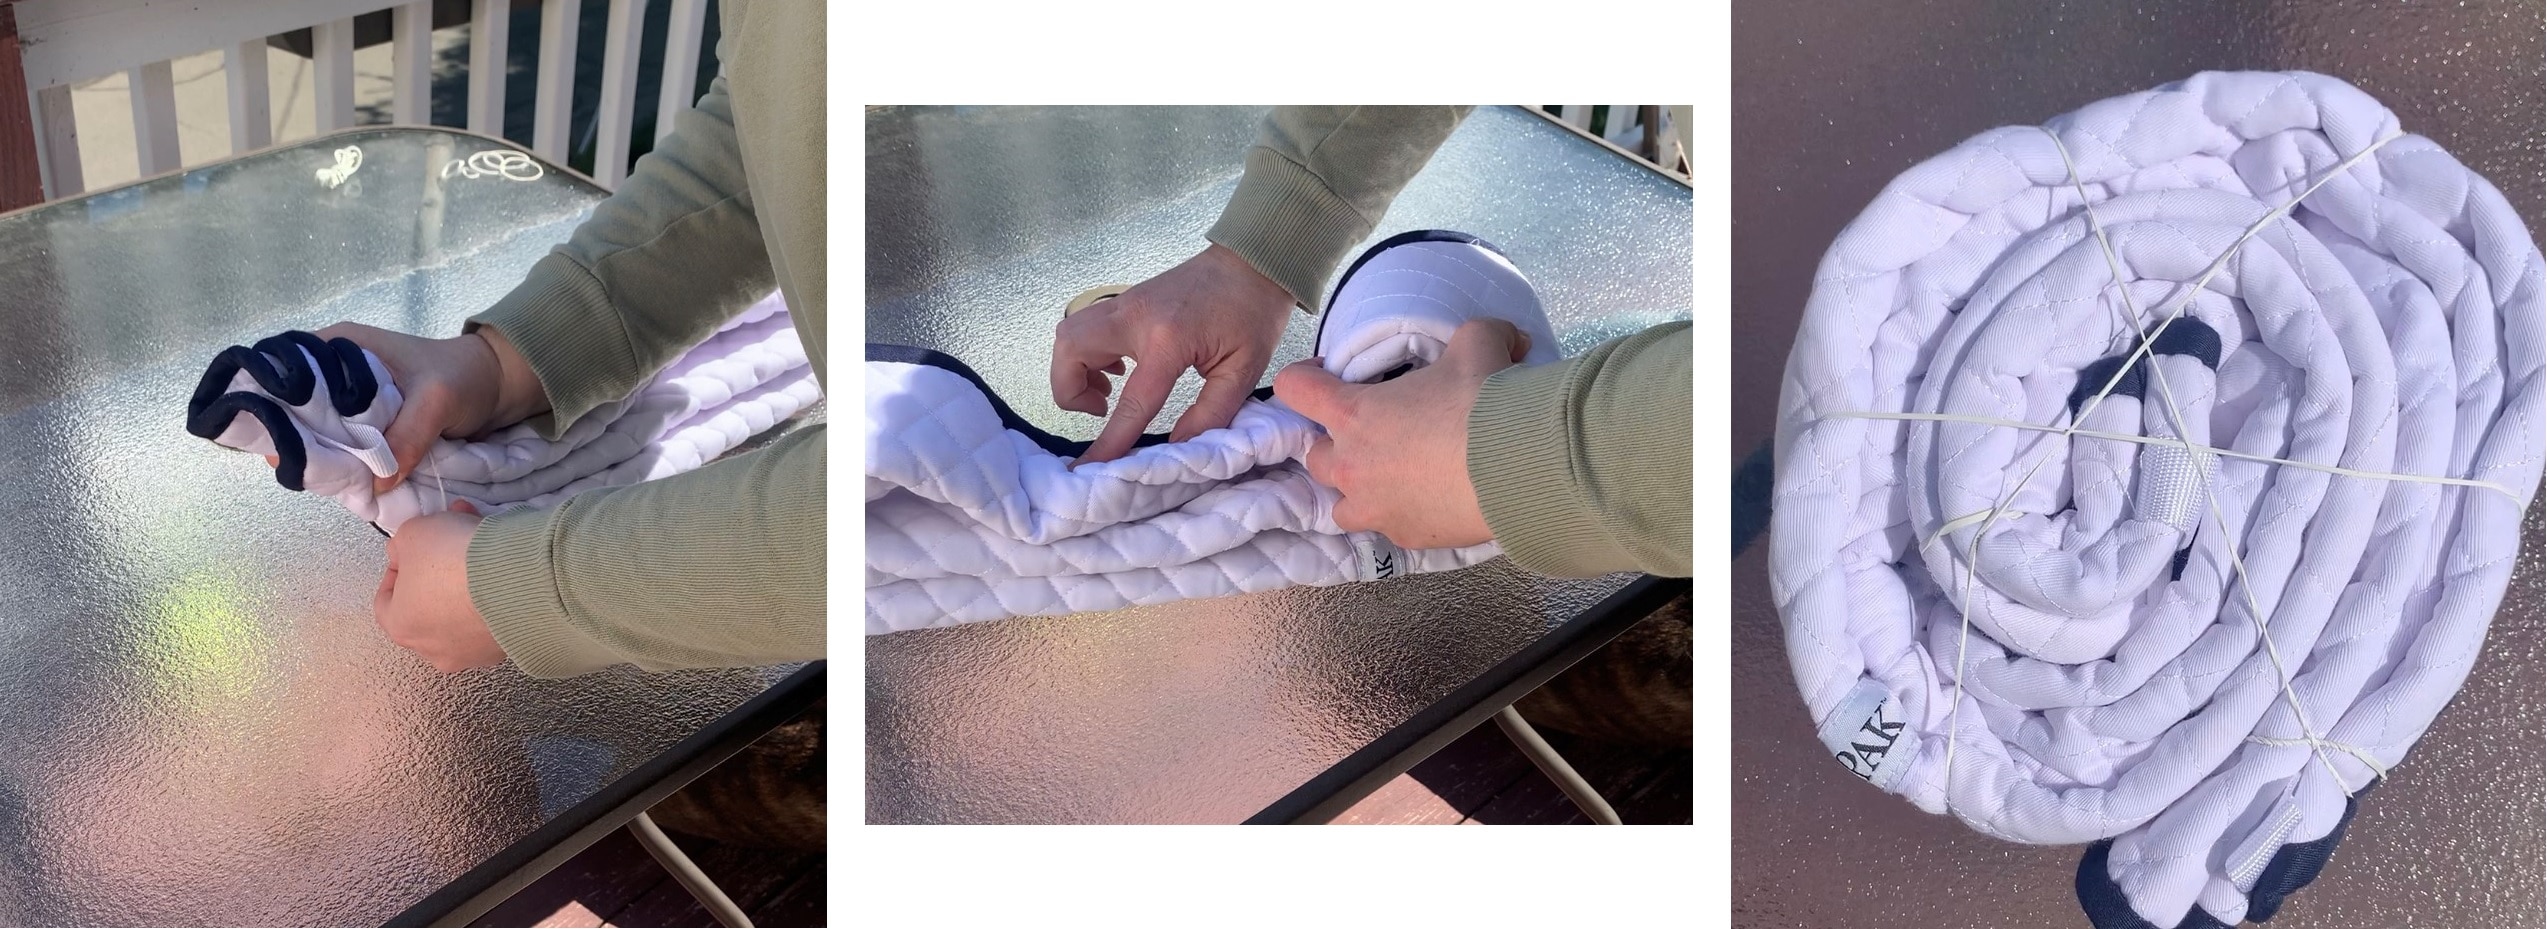
Accordion fold, spiral, and band
With the SmartPak Small Diamond Saddle Pad I utilized the swirl technique, pinching the fabric in the middle and twisting into a spiral. It’s important to get as many folds in the fabric as you can. You’ll see these folds start naturally as you begin the spiral and you’ll want to make sure that they continue to the end of the pad as you make it into a tight spiral. The spiral was a harder technique but would be easier if you have a friend to help and the result was worth it!
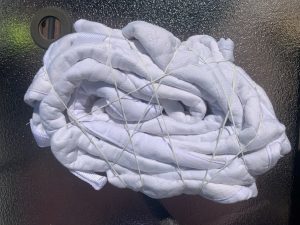
Lots of rubber bands for extra security
- Mix dye according to the package instructions
- Dye fabric. Lay out your table cover, put on gloves, and apply dye to the fabric. I used three bottles of dye, each in a different color. The type of material on saddle pads can be resistant to holding dye, so I made sure to really saturate the fabric and make sure that the dye penetrated all the folds. Also, make sure to flip over and color all sides.
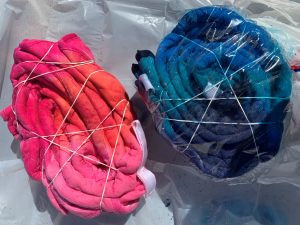
- Wrap and wait (the hardest part!). Once you’ve applied the dye, wrap your pad in plastic wrap to keep damp. I also then placed the wrapped pad into a plastic bag to make sure it didn’t leak. While many tie-dye instructions will tell you to wait 6-8 hours, I would suggest letting this sit longer to allow the colors to penetrate the fabric. I let these pads sit for 18 hours before I got impatient and unwrapped, but you could let these sit even longer!
For the unwrapping process, I would suggest putting on gloves again. I didn’t and now have some very blue hands.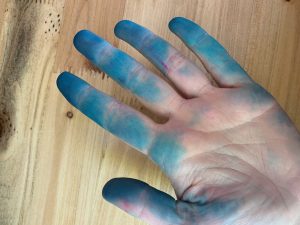
- Unwrap and rinse. A lot of dye will come out, so I laid the pads out in the backyard and sprayed with a hose to make cleanup easier. I hung the pads up on a clothesline to drip dry for a few hours and then individually washed each pad in the washer with hot water and a small amount of detergent. After washing I threw in the dry and that was it! You’ll want to continue to wash separately for the first few washes and if you have a grey or white horse you may want to wash more than once before using so avoid any dye transfer.


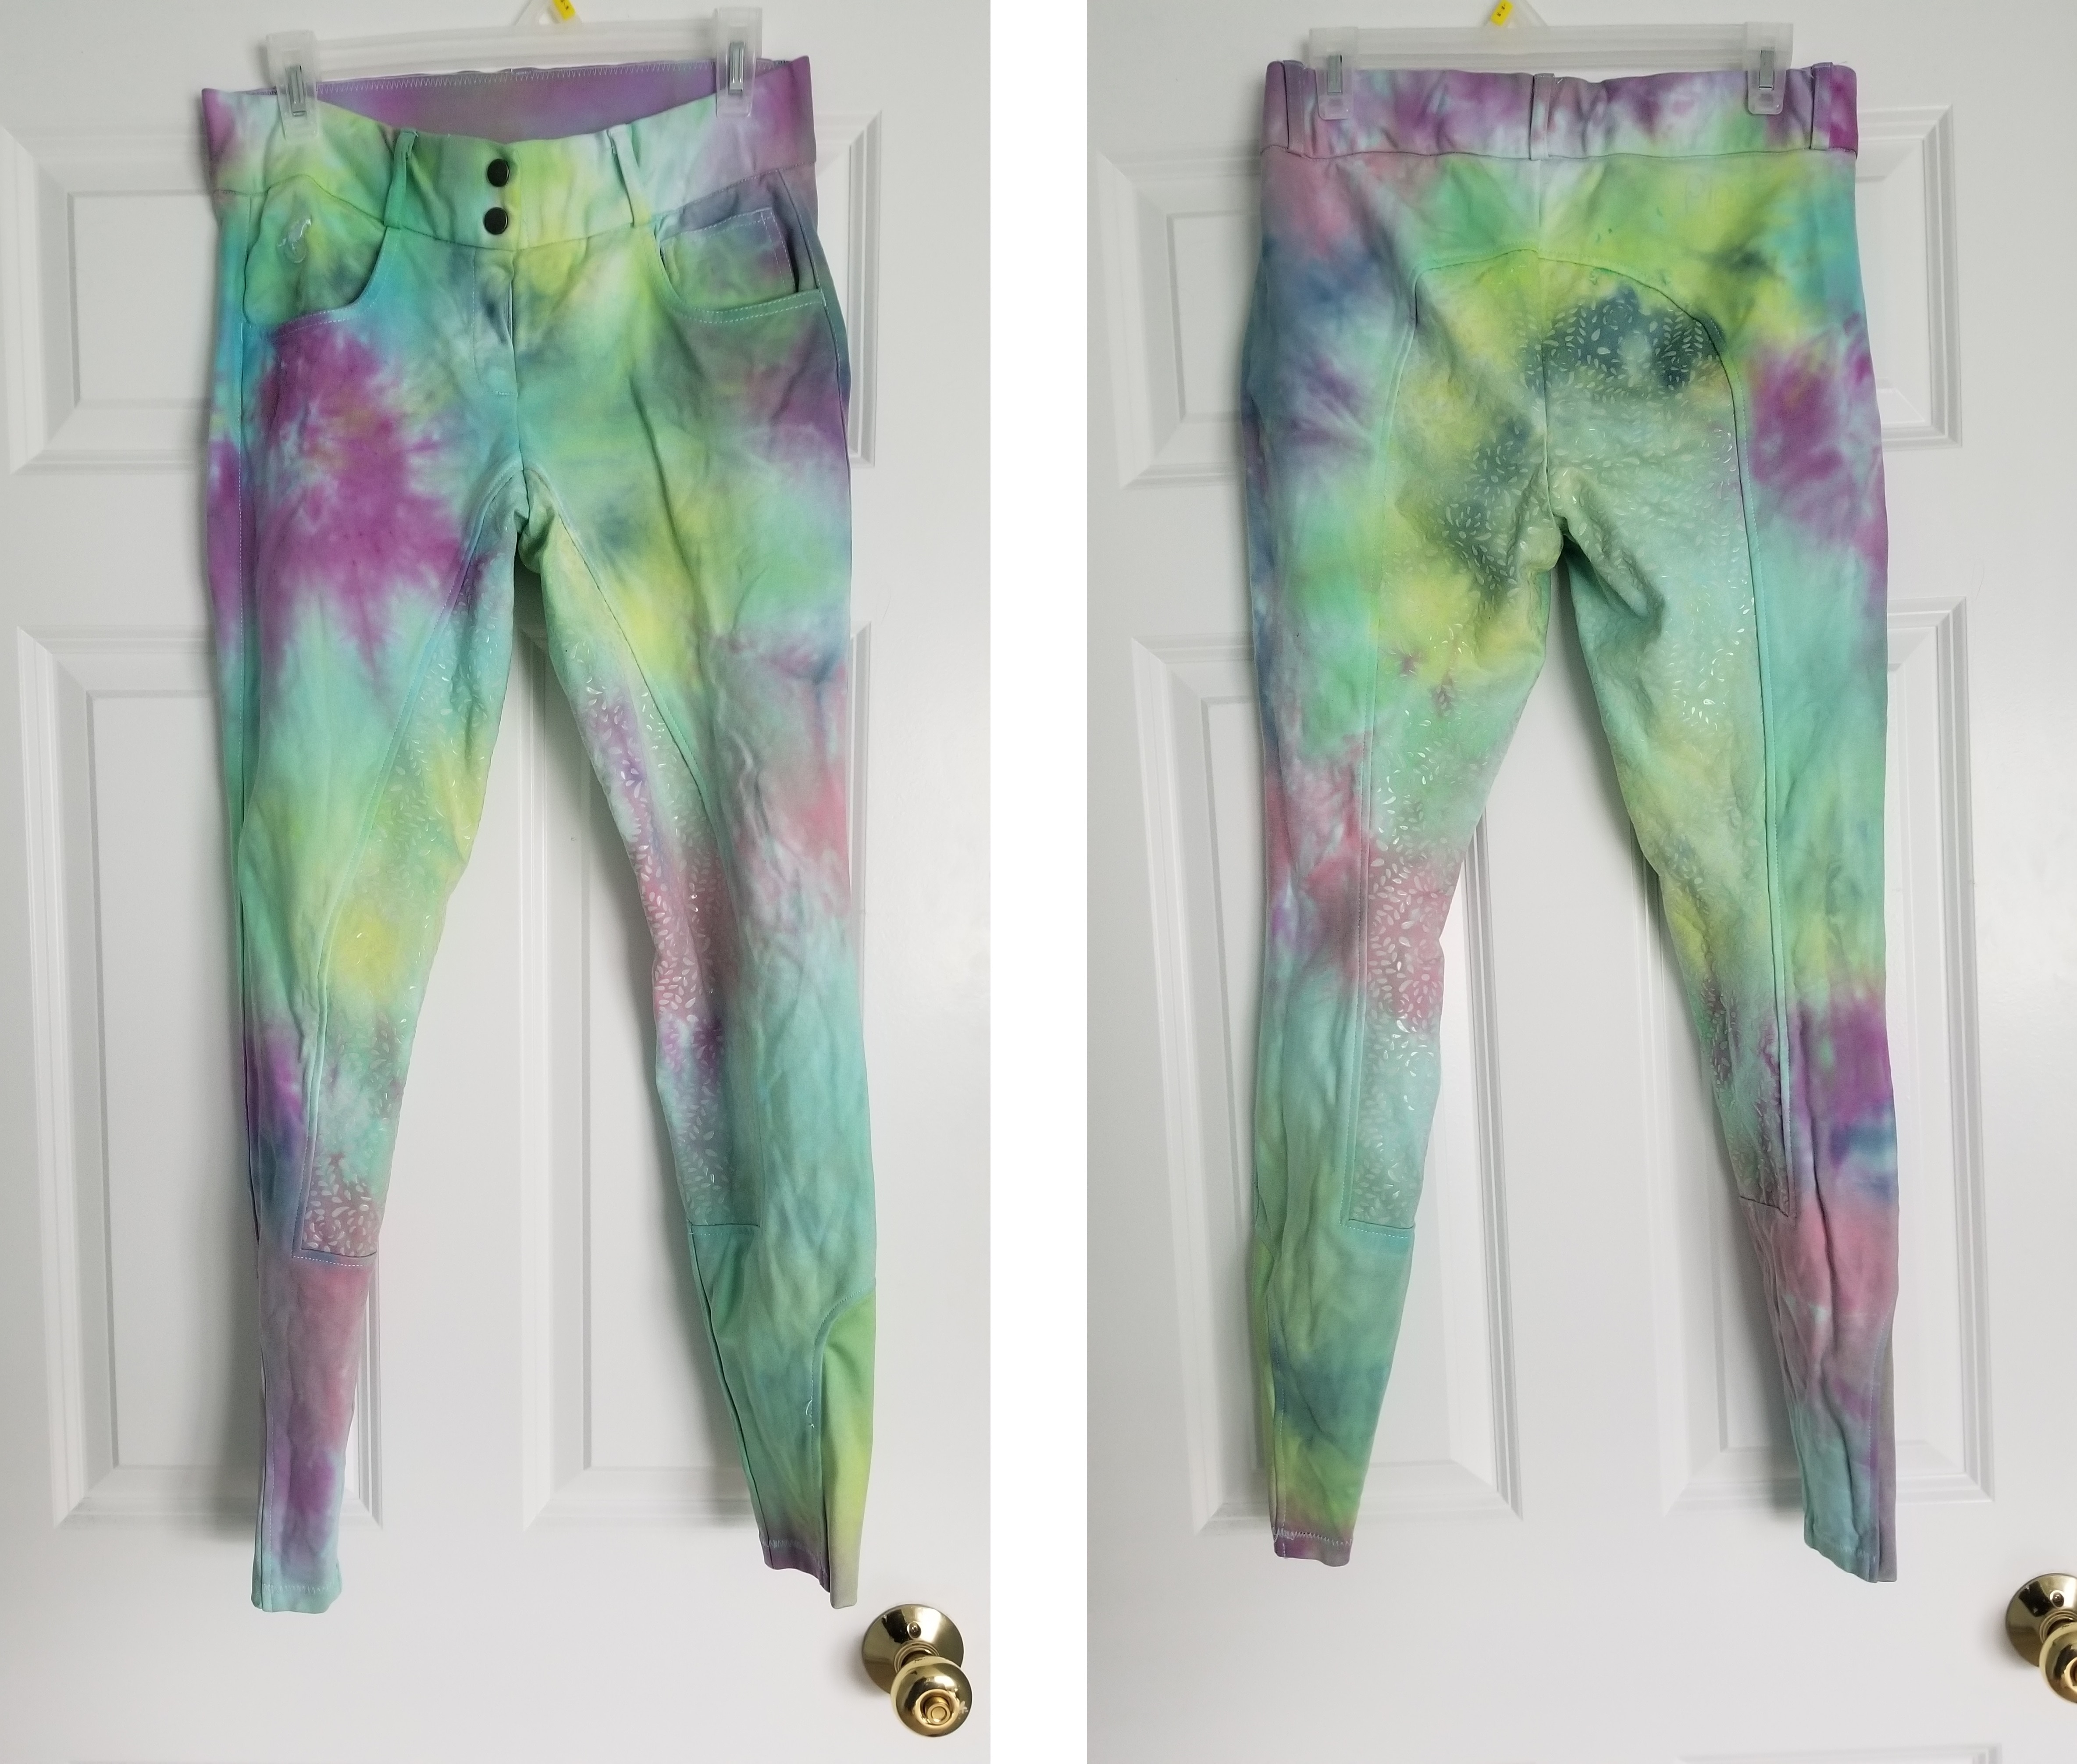
I started with saddle pads, but now officially have the tie-dye bug. SmartPak Kelcie has me inspired with her tie-dye Piper breeches (see below) so that might be my next project!
-SmartPaker Emily