SmartPak Recipe: Peppermint Pony Pop-Tarts
It is that time of the holiday season again when everything pumpkin spice is tossed to the side and peppermint makes its way front and center. I have always enjoyed baking holiday treats for friends and family but recently started thinking, “Well what about my horses?” I took to Pinterest to try and find a holiday-inspired peppermint horse treat recipe that did not require me to buy the entire grocery store. I wanted to make something that was both cute to look at but also easy to make. After looking at about a hundred different recipes I decided to make up my own concoction and my Peppermint Pony Pop-Tarts were born!
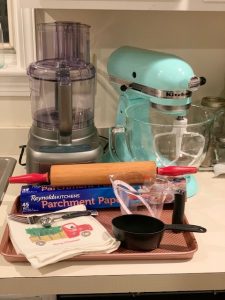 Supplies you will need:
 Supplies you will need:
- Baking Sheet
- Parchment Paper
- Rolling Pin
- Tablespoon
- Teaspoon
- Measuring Cups
- Stand Mixer (Hand Mixer and bowl works too!)
- Food Processor (you can sub a Ziploc bag and rolling pin for this step)
- Small bowl
- Spoon
- Butter Knife
- Fork
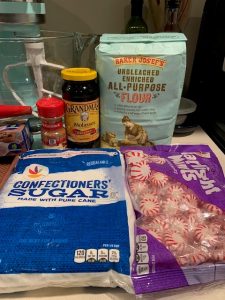 Ingredients you will need:
 Ingredients you will need:
- 2 cups All-Purpose Flour
- 8 ounces Molasses
- 1 teaspoon Cinnamon
- 1/4 cup Peppermint Candies (crushed) (about 25 peppermint candies)
- 1/2 cup Confectioners’ Sugar
- 1 tablespoon & 1 teaspoon Water
Instructions:
- Preheat your oven to 350 degrees (or if you are like me- forget to do this step and then sit around waiting for your oven to preheat when you have finished prepping your Peppermint Pony Pop-Tarts).
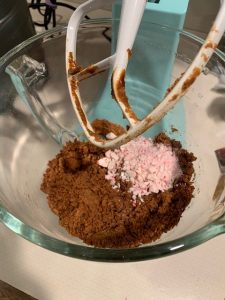
- In your food processor pulse together the 25 peppermint candies into a crumble/crushed consistency. If you do not have a food processor you can place the candies in a Ziploc baggy and use your rolling pin to crush the candies.
- Using your stand mixer, mix the flour, cinnamon, and molasses together. You will want to make sure that the dough is mixed enough that all the ingredients are combined and stick together so you can roll out the dough. Lastly, add in the ¼ cup of peppermints and mix until combined.
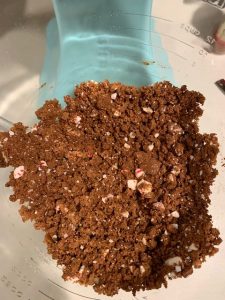
- Once your dough is mixed take two pieces of parchment paper and sandwich the dough in between (this makes for very easy cleanup!). If you would rather, you can sprinkle extra flour on both your counter and rolling pin and roll your dough out that way, too. I rolled my dough out to about a ¼ inch as I found that it made the perfect pop tart that was not too crunchy yet not too soft.
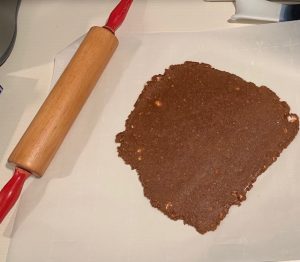
- I used a butter knife to cut my own rectangles in my dough as I did not have a rectangle cookie cutter. Then use a fork to crimp the edges of your dough to give it a true pop tart effect, I decided to crimp three out of the six pop tarts to see which style I liked better. I would recommend lightly dusting the tops of your pop tarts if you decide to crimp the edges because the dough is very sticky from the molasses and will stick to your fork.
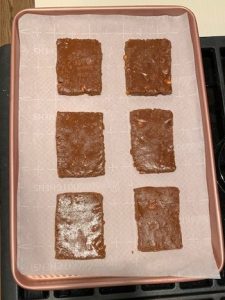
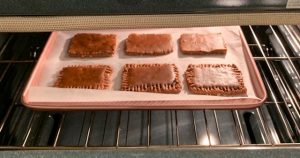
- Transfer your pop tarts to your parchment paper-lined baking sheet. If you do not have parchment paper just use a nonstick baking sheet. Place the pop tarts in the oven for about 10-12 minutes. Don’t be alarmed by the bubbling peppermint as the pop tarts bake, you can trim any spillage of peppermint after they are out of the oven.
- Once your Pony Pop-Tarts are out of the oven you can trim the side spillage (if any) and let them cool. I used a cooling rack that I have but if you do not have one you can leave them on your baking sheet and place them on top of your oven until they are cool to the touch.

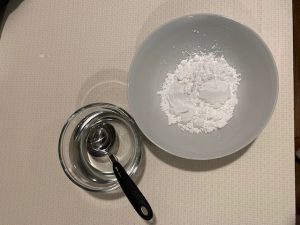
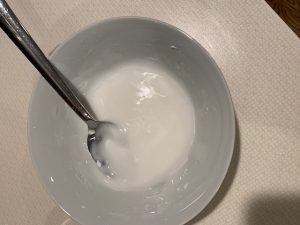
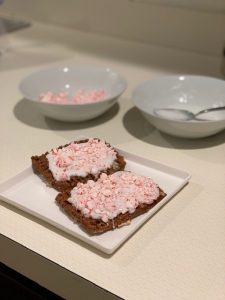
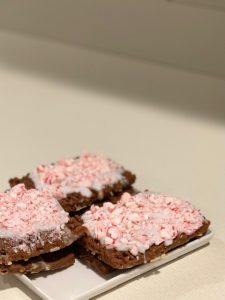
- Once they are cooled it is time to make your icing to top your Peppermint Pony Pop-Tarts! In a small bowl mix together the ½ cup of confectioners’ sugar and the water. If you feel that the consistency of the icing is too thick you can add more water but beware as a little bit of water can change the consistency of the icing in a big way! Once your icing is to the spreading consistency that you want to take your spoon and spread it over the top of one of your pop tarts. Immediately after icing the pop tart take some of your extra crushed peppermint candies and sprinkle on top.
- Set your fully decorated Peppermint Pony Pop-Tarts on a plate and let them sit for several hours to let the icing dry. Once the icing is dried you can stack these and store them in an airtight container, no need to refrigerate!


I would be lying if I said I did not sneak a bite of one of these and I was happy with the outcome, but I still was not sure if all of my horses would enjoy these. I have two horses, Rolex and Lucy, and my mom has a horse named Fox. Between all three of them, they cover the entire spectrum of pickiness. Rolex will eat literally anything, Fox likes most treats that you give him but can sometimes be picky, and then there is the Princess of the bunch, Lucy. Lucy is the pickiest horse I have ever met! She turns her nose up to most treats (even apples, weird I know).
Much to my surprise all three horses absolutely loved these treats! The only picture I had a chance of snapping of the horses eating their new favorite treats was of Lucy coming in hot for her second (and last) pop tart. For the rest of the afternoon, the three amigos watched me like hawks just in case I had one last pop tart (or crumb) for them to demolish.

I hope your horses enjoy these special holiday-themed treats as much as mine did and I hope you have as much fun making these special little beauties like I did! Happy Holidays from me and my three favorite Peppermint Pony Pop-Tart loving creatures!
-SmartPaker Erika